Tidal is a household name in audio streaming, offering a vast music library and exclusive content that sets it apart from competitors. Many users are attracted to Tidal due to its high-fidelity music. You have the ability to collect all your favorite tracks and create your own playlists based on genres or moods. However, there may come a time when you want to convert your Tidal playlists to local music files or export them to CSV or TXT files. Perhaps you’re considering switching to another music platform but can’t bear to lose your meticulously crafted playlists. In such scenarios, the best solution is to export Tidal playlist. If you’re unsure how to go about this, don’t worry. This post will guide you step-by-step through the process of exporting your Tidal playlists to local music files, CSV files, or TXT files, ensuring you retain access to your favorite music and playlists no matter where you go. Without further ado, let’s explore these effective methods together.

Part 1. Can You Export a Playlist from Tidal?
Many music lovers don’t want to abandon the carefully curated playlists, but they are not sure whether Tidal allows them to export playlists or not. Well, the answer is absolutely yes. We all know that it takes a lot of work to create a music playlist. Although Tidal does not offer such a feature, there are many third-party tools in the industry that can help you transfer Tidal playlists to other platforms and export Tidal playlists to other files. With their help, you can easily enjoy your preferred Tidal songs and keep the playlists forever whichever platforms you are using. All these tools can also assist you in managing and backing up your music library.
Part 2. How to Export Tidal Playlist to Local Music Files
There is no doubt that the best method to save your favorite Tidal playlist is to download all the tracks as local files. Tidal allows HiFi or HiFi Plus subscribers to utilize the downloading feature, but what you can get are all DRM-protected files that can only be recognized and played in the Tidal app. If you want to convert your Tidal playlists to plain music files and save them permanently, you need to use one tool to remove the DRM protection. Here we’d like to recommend Tunelf Tidal Music Converter.
Tunelf Tidal Music Converter is a functional and efficient music converter. It is designed for all Tidal users, aiming to help you download tracks, playlists, albums, and podcasts from Tidal whether you have a Tidal subscription or not. With its help, it’s a breeze for you to remove the DRM protection and save Tidal music in diverse audio formats, such as MP3, FLAC, AAC, M4A, M4B, and so on. When the downloading and conversion process is finished, you can import the DRM-free music files to other players and devices for offline listening if you want. Many audiophiles may wonder if they can still get the original music experience. Well, the answer is positive since the Tunelf program not only keeps the music quality but also can download high-fidelity MQA and Dolby Atmos music. To ensure you can manage your playlists better, the Tunelf program even maintains all the ID3 tags and metadata of all downloaded songs.

Key Features of Tunelf Tidal Music Converter
- Download any Tidal content, including songs, albums, playlists, and artists
- Support exporting Tidal music to MP3, AAC, FLAC, WAV, M4A, and M4B
- Preserve a whole set of ID3 tag information in the downloaded Tidal songs
- Handle the conversion of Tidal music up to 5× faster speed and in batch
Step 1 Load Tidal Playlist to the Tunelf program
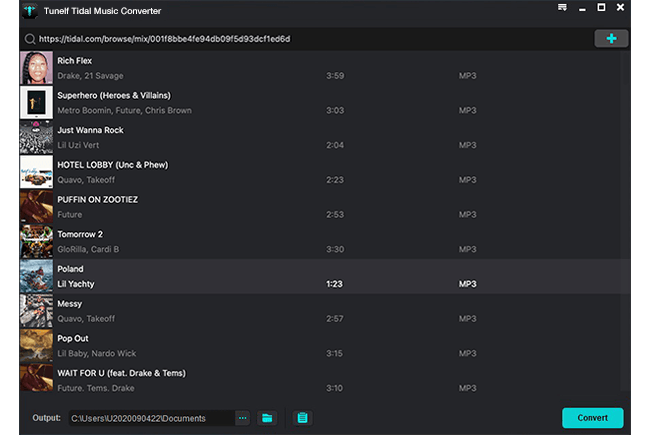
Through the download link above, you can download the Windows version or the Mac version of Tunelf Tidal Music Converter and install it on your desktop. Then, you can launch it. At the same time, the Tidal app on your computer will be opened automatically as well. What you should do next is load the playlist you want to download from Tidal to the interface of the Tunelf program. Just enter the detailed page of the playlist and choose More > Share > Copy playlist link. After that, you can head to Tunelf’s interface and paste the link into its top search bar. Once you click the add icon next to it, you can see all the tracks from this playlist shown below. This is the sign that you load the playlist successfully.
Step 2 Reset the music output settings
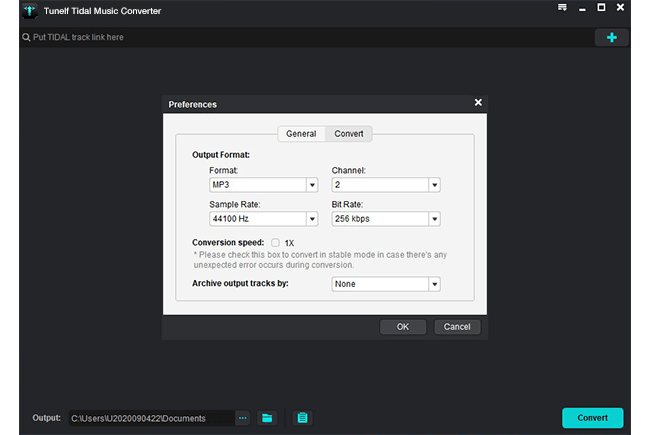
Depending on your needs, the Tunelf program allows you to set the output settings as you wish. Click the menu icon at the top right corner, then select Preferences > Convert. Here you can decide on the format of the downloaded music and other settings as well. For example, you can adjust the parameters like channel, bit rate, and sample rate. The most important step is to hit the OK button so that your changes will be saved successfully.
Step 3 Export Tidal playlists to local music files
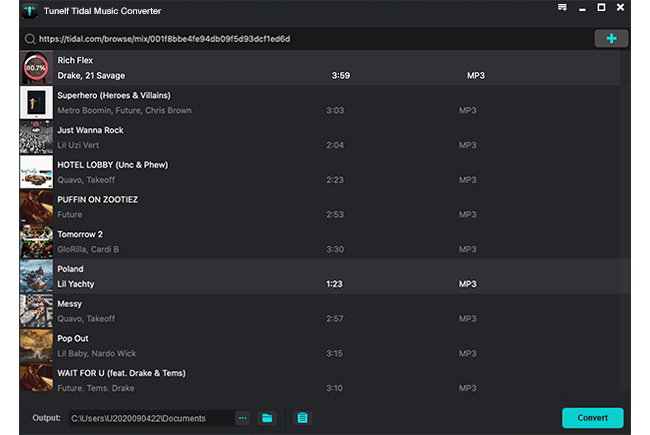
Whenever you are ready, just click the Convert button and the Tunelf program will begin downloading and converting the music you add. The time it consumes depends on how many tracks you add. Once done, you can enjoy the DRM-free music files on any device you like. If you want to find its location on your computer, you just need to click the Converted icon.
Part 3. How to Export Playlist from Tidal to Other Platforms
Here is a possible situation in which you used Tidal for a long time and have a vast collection of tracks and playlists. If you now want to move to other music platforms, it can be difficult to export all your playlists intact. Re-adding all the tracks can be energy-draining. Under this circumstance, you should try one helpful tool – Soundiiz. It is an online tool that can achieve the seamless transfer between 2 different online music streaming services. By using this tool, you are able to recreate your music library quickly and effectively. It is compatible with 43 available services. Now, follow the steps below to export your Tidal playlists to other music services without much effort.
1. Visit the Soundiiz website on any of your browsers. Then, click Start for free.
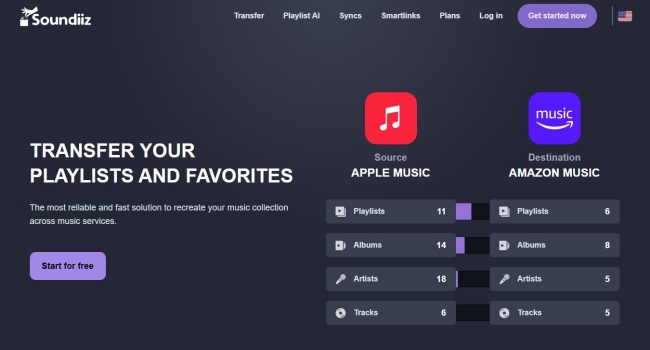
2. Now you should log in to your account. If you don’t have an account, you can simply register one for free.
3. In your account interface, you should click CONNECT SERVICES at the left bar and choose Tidal from all available options. Then, you should log in to your Tidal account in the new pop-up window.

4. Once done, you can click Tidal on the left, then choose Playlists. Then, you will see all the playlists on your Tidal Collection.
5. Choose the one you want to export. Then, click the Transfer button at the top.
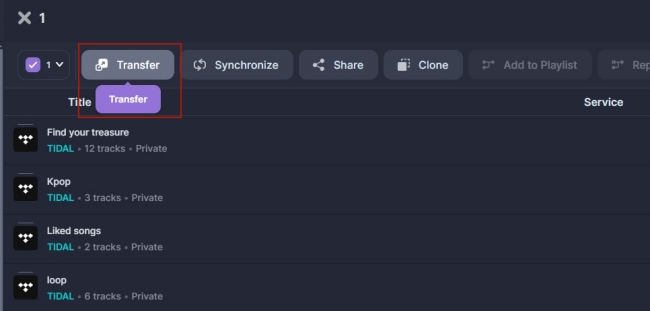
6. Next, you can configure this playlist and confirm the tracklist. Once done, choose the destination and log in to your account on that music platform.
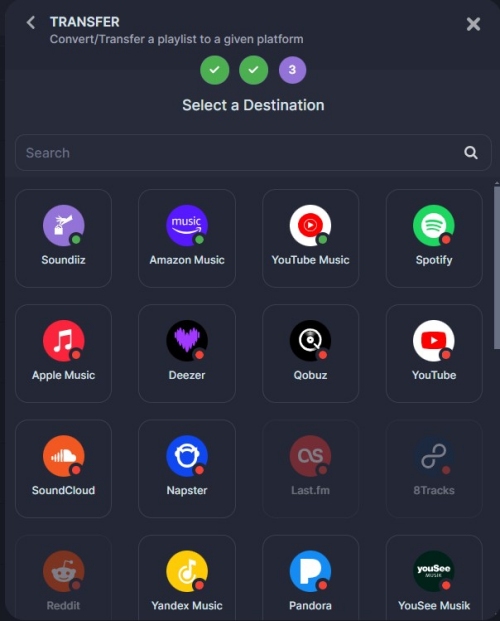
7. Wait for a while until the transfer process ends. Then, you can check your Tidal playlist on the new music platforms and still enjoy your favorite songs with ease.
Part 4. How to Export Tidal Playlist to Text/Excel Files
To avoid an accidental deletion or loss of access to your favorite playlists, you can consider exporting the Tidal playlist to CSV or TXT files. Once you store the file on your computer or cloud storage, you will have a copy of your playlist data even if the original sources become unavailable. In addition, you can send this CSV or TXT file to your friends, making it convenient to share the Tidal music you like. The CSV or TXT file is also useful when you want to analyze or organize your music library because you can use spreadsheet apps o sort tracks depending on your needs. TuneMyMusic can be a good choice for your objective.
1. Open your browser and go to the official website of TuneMyMusic. Click Let’s start to begin the exporting process.
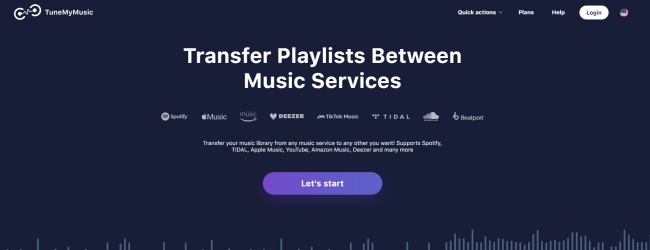
2. Hit Tidal from all music services to choose it as the source. Then, you can sign in to your Tidal account.

3. Select the playlist you want to download as a CSV or TXT file. Then, click Choose Destination.
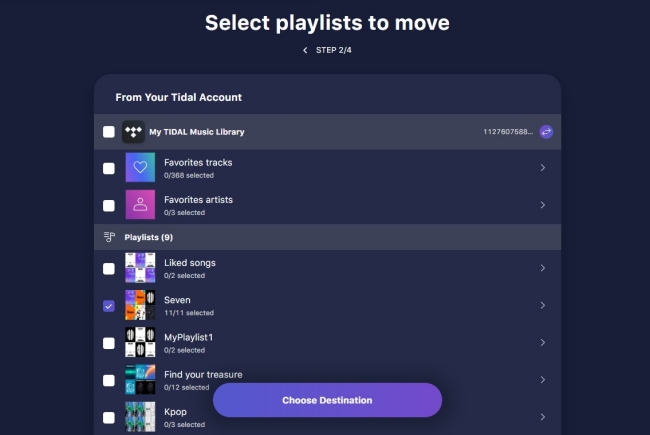
4. Next, you should select Export to file > TXT/CSV > Export.
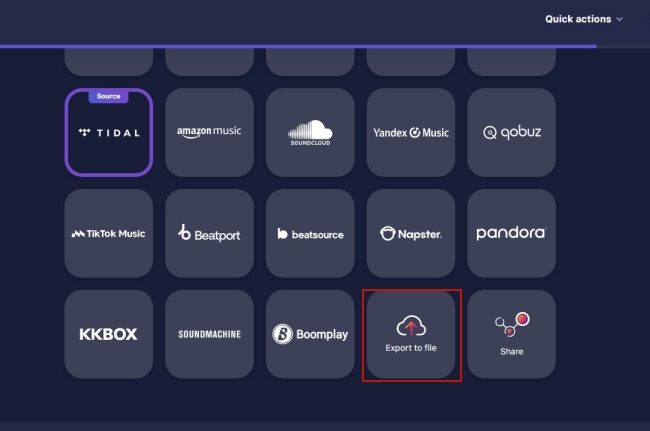
5. Now you just need to click the Start Transfer button and you are done.
Note
The number of Tidal tracks you can use TuneMyMusic to transfer or convert is less than 500. Otherwise, the tool will charge a one-time fee.
Part 5. Conclusion
Is it possible to export Tidal playlist? Absolutely yes! This post shows you all the effective methods to export Tidal playlists to CSV or TXT files. But if you want to keep your accessibility to your favorite Tidal playlists, the best method is to download them as normal audio files by using the Tunelf Tidal Music Converter. Once done, you can save the music files forever and listen to them on any device you like offline.
Get the product now:
Get the product now:


