As a music lover who has been using Apple Music for a long time, there must be a lot of well-known artists who appeal to you. Surprisingly, Apple Music also has a feature that allows you to stop missing out on anticipated releases by your favorite artists. This feature is to pre-save upcoming songs or albums to your library. So how does this feature work and how to pre save songs on Apple Music and how does this feature work? Read below to find out more about it.

Part 1. Pre Save on Apple Music: Everything You Need to Know
1.1 What is Pre Save on Apple Music?
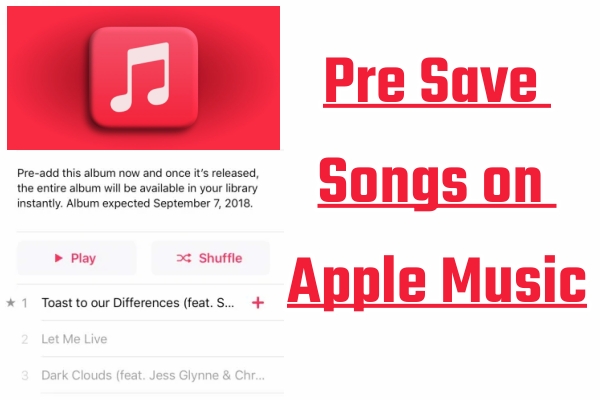
Pre save songs on Apple Music is a feature that pre-adds your favorite upcoming release to your library. Available with just a tap to pre-add, Apple Music allows listeners to add their favorite songs from an upcoming release to their library or playlists without missing new information. This is a great feature that can help you keep track of new music from your favorite artists.
1.2 Can You Pre Save Songs on Apple Music?
The answer is sure. However, what you need to make sure in advance is that the release date of the song you want to pre-add is at least a day later. Please note that you can add albums or EPs to the library, but can’t pre-add songs on a single track.
1.3 How to Find Pre Saved Songs on Apple Music
Once you have pre-added songs on Apple Music, you can find them in your Library>Albums.

1.4 What If Apple Music Pre Save Is Not Working
If you encounter the problem of Apple Music pre save not working, then you can try the following actions to fix it.
- Check your network status and try to reconnect your internet connection
- Restart your Apple Music app
- Check and update your Apple Music app to the latest version
- Check that the release date of the song you want to pre-add is at least one day later.
- Make sure you have at least one song or video in your library
Part 2. How to Pre Add Albums on Apple Music
Once you learn the above information about Apple Music pre save, you can start pre-adding the album you want to be the first to get the sound source.
Step 1. Head to the Apple Music app on your mobile phone.
Step 2. Hit the Browse tab at the bottom bar, then scroll down until you view the Coming Soon section and tap it.

Step 3. Choose the album you want to pre-add and tap it, then tap the Add+ icon in the upper right corner.

You can also swipe the screen to view the upcoming release date of this album.

Once you’ve pre-saved the album successfully, there will be a message at the bottom of the screen showing Added to library. After that, Apple Music will notify you when it’s released, and you’ll be able to stream your favorite songs in the library.

Bonus Tip: Download Your Favorite Apple Music Songs to MP3
Following the above simple steps, you’ve pre-added the songs to your library. So, how do you permanently download and save these newly released songs when you realize that you really like them later? As you know, the downloaded songs on your Apple Music are only accessible to you until your subscription doesn’t expire. Thanks to a third-party tool called Tunelf Audio Converter that can help you download Apple Music to MP3 files to save them permanently on your device.
Own to Tunelf Audio Converter, you can convert Apple Music, iTunes audio, and Audible audiobooks to MP3, WAV, AAC, FLAC, M4B, and M4A easily and rapidly. In addition, Tunelf offers the ability to keep 100% lossless audio quality and retain the ID 3 tags after conversion. Then, you can transfer the converted music files on any supported player like iPod, Galaxy Watch, Sony Walkman, PS5, and more. It’s such a pleasure to save your favorite artist’s songs permanently and then play them offline on multiple devices, isn’t it?

Key Features of Tunelf Audio Converter
- Convert Apple Music to MP3, WAV, FLAC, AAC, and other audio formats
- Remove DRM from Apple Music, iTunes audios, and Audible audiobooks
- Preserve the converted audio with lossless audio quality and ID3 tags
- Support the conversion of audio format at a 30× faster speed in batch
Step 1 Upload Your Favorite Apple Music Tracks
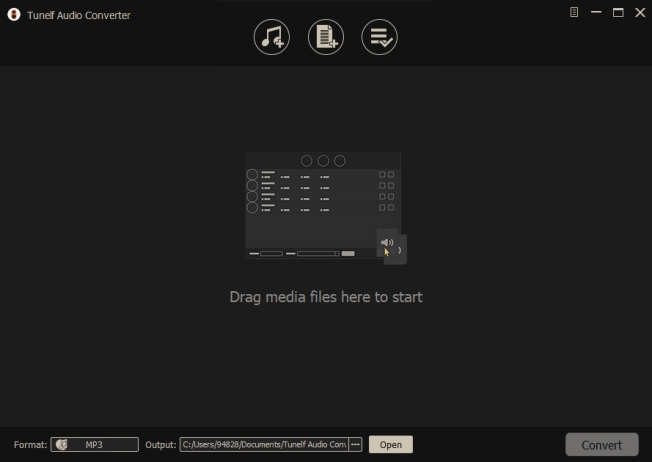
Install and launch Tunelf on your computer, then your Apple Music will be fired at the same time. Now you can click the Add icon on the converter to upload your favorite Apple Music files. Or you can choose to drag and drop your target Apple Music to the main interface of the converter directly.

Step 2 Personalize Output Format and Audio Parameters
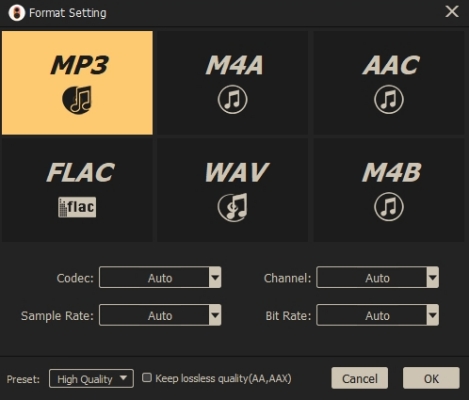
After your favorite music files are loaded into Tunelf, click the Format button at the bottom left corner. Then you can choose the output format, codec, channel, sample rate, and bit rate on the pop-up window. You can choose the common format MP3 to be compatible with more devices. Save your settings with the OK button.

Step 3 Start to Download Apple Music to MP3
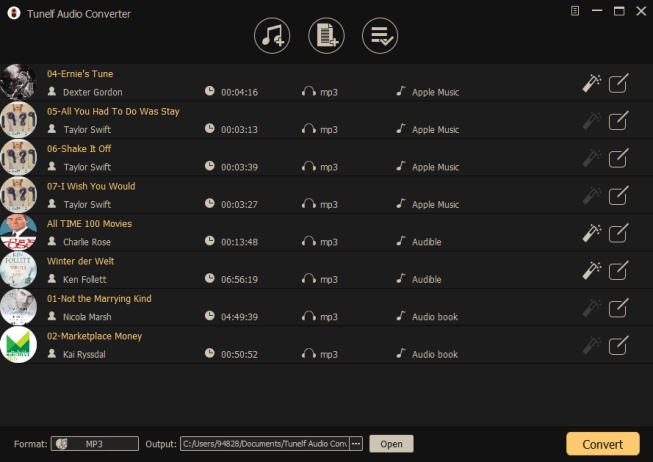
After all the settings are done, you can click the Convert button to start the conversion. Then Tunelf will download and convert your selected Apple Music to your device. Remember that you can also click the Converted button to view the downloaded local files.

Conclusion
You can simply follow the above steps to pre save the unreleased songs to your library. In that case, you won’t forget to add your favorite artist’s music to your library when it is released. You can also download and save your favorite Apple music permanently to your device with Tunelf Audio Converter. With all these features and tools, it will really enhance your music experience.
Get the product now:
Get the product now:


