Playlist export option for Apple Music App on Window 11. Is Apple going to provide a mechanism to export/import user created playlists in the Apple Music App running on Window 11 Pro (23H2 with latest updates) like iTunes? Or are we left to try and find a .plist to m3u converter and try that on the playlists under the Music\Apple Music Library.musiclibrary\preferences folder?
— User from the Apple CommunityApple Music is a household name in audio streaming, with millions of songs, albums, and curated playlists. It has received worldwide popularity due to the great music experience it offers. However, users may sometimes want to move their playlists to different devices or platforms, whether for personal convenience or sharing with others. In this case, here comes the question: how do you export Apple Music playlist without losing your songs or encountering frustrating compatibility issues?
In this post, we will present the answer. To help you enjoy your music on different devices and music platforms without any hassles, we have prepared the best 6 methods that will walk you through how to export Apple Music playlists to other devices or services. Keep reading to explore more!

Part 1. How to Export Apple Music Playlist to MP3 [Best Way]
Apple Music offers a seamless music experience, allowing you to enjoy various music tracks and create your own playlists. You can even download your playlists for offline listening. However, it is known that Apple Music applied DRM (Digital Rights Management) on all of its music to ensure that content can only be accessed within its official app or website. This can make it tricky to export Apple Music playlists in a universally compatible format. However, by converting the music into normal audio formats such as MP3, you can enjoy your playlists on various platforms or devices. To do that, you will need the help of a professional converter. Try the Tunelf Apple Music Converter.
Tool Required: Tunelf Apple Music Converter
Tunelf Apple Music Converter is a powerful and functional music converter designed specially for all Apple Music users. Adopting an amazing decryption technology, the Tunelf software has the ability to remove Apple Music DRM and convert your favorite songs, playlists, albums, and even podcasts to plain music files. It supports a variety of audio formats, including MP3, WAV, AAC, FLAC, M4B, and M4A. It is no exaggeration to say that the Tunelf software is the best tool for exporting Apple Music content.
What’s more, the Tunelf software automatically keeps all the ID3 tags and original sound quality to enhance your listening experience. After converting, it’s a breeze for you to transfer your playlists to other media players or devices and listen to them offline. You can also transfer them to a USB or SD card for backup.

Key Features of Tunelf Audio Converter
- Convert Apple Music to MP3, WAV, FLAC, AAC, and other audio formats
- Remove DRM from Apple Music, iTunes audios, and Audible audiobooks
- Preserve the converted audio with lossless audio quality and ID3 tags
- Support the conversion of audio format at a 30× faster speed in batch
Step 1 Add Apple Music playlist to the Tunelf software
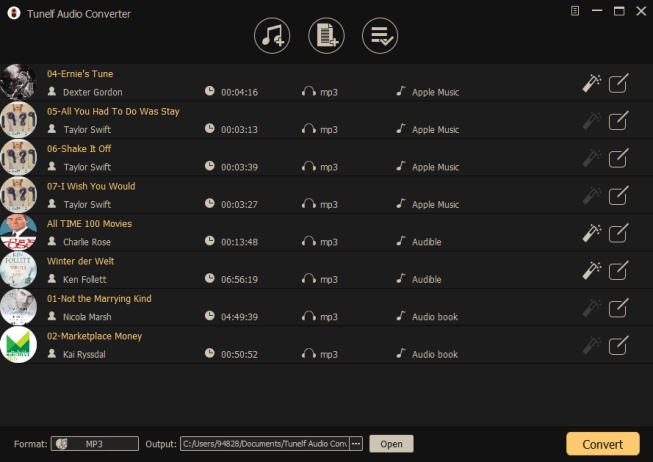
According to the operating system of your computer, you can choose to download the Tunelf Apple Music Converter Windows or Mac version. Click the Download button above and you can get it freely on your desktop. After installing, double-click the Tunelf software to launch it. It will help open the iTunes app on your computer automatically. You can click the Add File icon and select all the songs on your playlist. Then, add all of them to Tunelf’s interface.
Step 2 Set MP3 as the output format
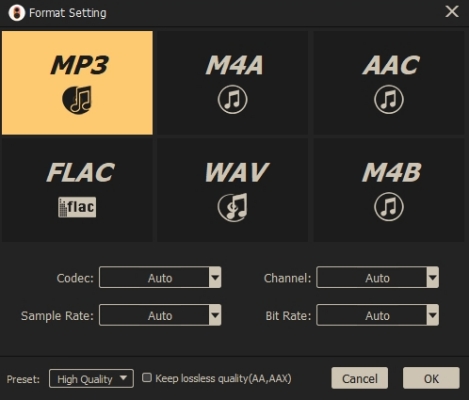
When you add all the songs you want to download, it’s time to set the audio settings depending on your needs. Simply click the Format panel at the bottom left and you can choose one audio format in the new window. Since MP3 is compatible with most apps and devices, you can select it to avoid incompatibility issues. In addition, you can configure other settings, like codec, channel, sample rate, and bit rate to personalize your listening experience.
Step 3 Convert Apple Music playlist to MP3 for unlimited offline playing
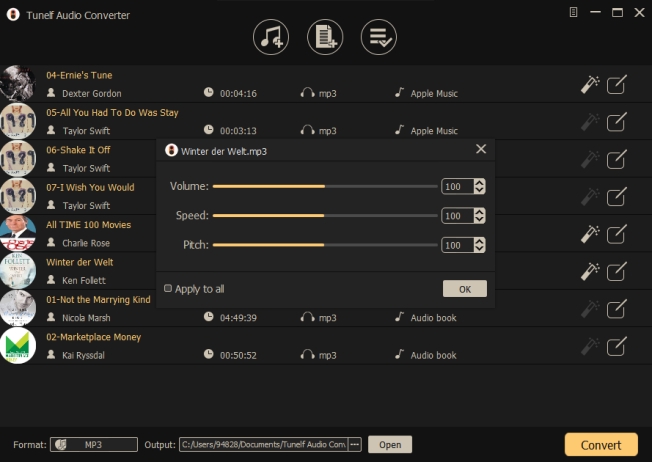
Now, you are ready. Click the Convert button at the bottom and the Tunelf software will begin converting your Apple Music playlist automatically. How long it takes depends on how many songs you added. Once finished, you can click the Converted icon to check their location on your computer. Next, feel free to import them to other media players or devices.
Part 2. How to Export Apple Music Playlist to CSV/TXT/XML
As mentioned above, you can not export the Apple Music song itself directly due to the DRM protection. But Apple Music allows you to save a copy of your playlists or import them on a different computer in case you want to have the same playlist on multiple devices. There are also many third-party tools that can help you back up the Apple Music playlist to a CSV/TXT/XML file, ensuring that you don’t lose your music if your subscription ends. You should notice that this step only exports the song information instead of the actual songs.
Option 1. Save a Copy of Playlists in Music/iTunes [Official Method]
1. Go to the Music or iTunes app on your computer and sign in to your Apple ID.
2. Then, select one playlist in the left section.
3. Move your cursor to the top menu bar, and click File > Library > Export Playlist.

4. After that, a new window will pop up. Here you can choose the file format you need, like CSV, XML, or TXT.
5. If you want to import this playlist to another computer. You can simply click File > Library > Import Playlist and select the file.
Option 2. Utilize Third-Party Transfer Tools
There are a lot of third-party transfer tools available on the market that can help you export your Apple Music playlists to CSV, XML, or TXT files. Popular options include TuneMyMusic, Soundiiz, and MusConv. These tools are designed to simplify the process of transferring your playlists across various platforms or exporting them for backup purposes. Depending on your specific requirements, you can choose the tool that best suits your needs. Most of these tools are user-friendly, you can follow its guide to access your favorite playlists in an organized format.
Part 3. How to Export Apple Music to Other Streaming Services
Another possible reason for exporting Apple Music playlists is to transfer them to other streaming services like Spotify, Tidal, or Amazon Music. Normally, Apple Music and other streaming platforms don’t allow you to transfer your playlists seamlessly. However, there are some tools and services that can help you to do so. Read the following content to explore them in detail.
3.1 Via Apple’s Data and Privacy Page
On Apple’s Data and Privacy page, you are allowed to request to transfer your playlists that you curated on Apple Music to YouTube Music. This is not a difficult process. All you need is an active Apple Music subscription and an active YouTube Music account. But this method can only transfer the playlist you have created. What’s more, the transferred playlist can only include songs that are available on YouTube Music. If it contains other audio content, like podcasts and audiobooks, they can not be transferred.
1. Head to Apple’s Data and Privacy page and sign in to your Apple ID.
2. Select the Transfer a copy of your data option.
3. Then, follow the on-screen instructions to finish the transfer process. Don’t forget to sign in to your YouTube Music account before transferring.
4. Once finished, you will receive a confirmation email from Apple. That means you can enjoy your Apple Music playlists in your Library in YouTube Music without hassle.
3.2 Via TuneMyMusic
TuneMyMusic is a versatile online tool designed to help users transfer playlists across various music streaming platforms, including Spotify, Apple Music, Tidal, Deezer, and more. If you are looking for a method to transfer your Apple Music to other streaming services directly, it can be a good choice.
1. Open your browser and head to the TuneMyMusic website.
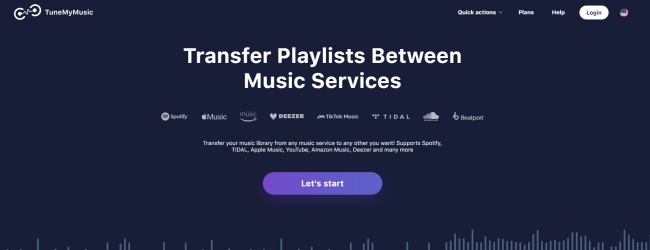
2. Click Let’s start. Then, you need to select Apple Music as the source.
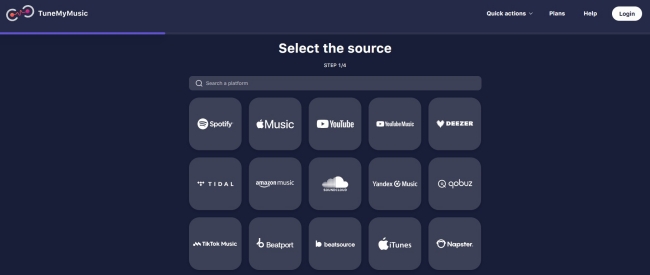
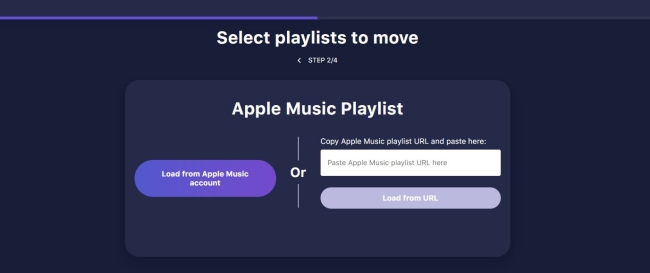
3. To transfer your Apple Music playlists, you need to sign in to your account by clicking Load from Apple Music account > Connect.
4. After that, you need to choose one streaming service as the destination and pick the playlists you need to transfer.
5. Once finished, click Start Transfer and you are done.
3.3 Via Soundiiz
Similar to TuneMyMusic, Soudiiz is a powerful and user-friendly transfer tool. You can use it to seamlessly transfer and manage your music playlists across multiple streaming platforms, such as Apple Music, Spotify, Tidal, Amazon Music, and many more. Thanks to its intuitive interface and robust compatibility, Soundiiz is a go-to solution for anyone seeking an efficient way to export their Apple Music playlists.
1. Visit https://soundiiz.com/apple-music/export-playlist on any of your browser apps. Then, find the music platform that meets your requirements and click the Read button next to it.
2. You can read the instructions on the new web page. Then, click Start Free to begin the transferring process.
3. You need to log in to your Soundiiz account. If you don’t have one, you need to register first.
4. Connect your Apple Music and the other streaming platform account to Soundiiz. Next, you can follow the on-screen steps to transfer your playlists.
Part 4. Conclusion
Exporting your Apple Music playlists doesn’t have to be a complicated task. Whether you want to enjoy your playlists on other devices, transfer them to another music service, or save them locally for backup, there are a variety of methods available. As long as you follow the comprehensive guidance above, you can export Apple Music playlist easily and effectively. Among them, the best method is definitely converting Apple Music playlists to MP3. Try the Tunelf Apple Music Converter to achieve your goal with ease.
Get the product now:
Get the product now:


