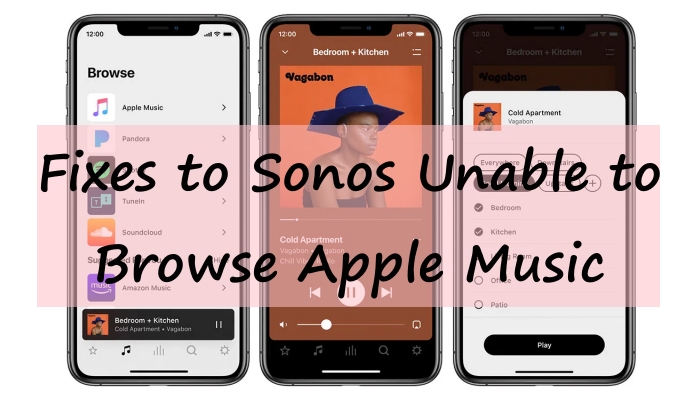
Apple Music is one of the best music streaming services, with a large amount of songs available in its music resource library. It allows you to enjoy your favorite music and create your playlists. For a different listening experience and great audio quality, playing Apple Music on Sonos could be a nice choice. As a smart speaker, the Sonos works well for playing music with a clear sound that surrounds your room. To play Apple Music on Sonos, all you need to do is download the Sonos app and then you’ll be able to get Apple Music on your Sonos audio system with just a tap on your device.
Have you ever encountered such a situation where you’re ready to groove, and trying to play your favorite Apple Music songs on Sonos, but your Sonos speaker says, “Unable to browse music”? In this post, we’ll explore why Sonos unable to browse Apple Music. And introduce several ways to fix Sonos unable to browse Apple Music.
Part 1. Why Is Sonos Unable to Browse Apple Music?
If your Sonos app is unable to browse Apple Music, the first thing we should do is figure out the reasons. Then for these reasons, we’ll offer you several fixes to this issue. Let’s take a look at the reasons.

Internet Disconnection
If you are using an unreliable or unstable internet connection, it might be the reason of Sonos unable to browse Apple Music. A poor internet connection also affects the way Apple Music works on your Sonos. So, check the internet connection before you launch the app.
Bugs in the Sonos App
Every app is possible to have bugs, and Sonos is no exception. If there is a bug in your Sonos app, it may be causing the problem. When your Sonos app freezes, you won’t be able to access it, let alone browse music on it. Sometimes, it can also be your Sonos version is out of date.
Invalid Apple Music Subscription Account
Sometimes, the issue may be caused by your streaming service account. For instance, if your Apple Music subscription is expired, you won’t be able to listen to music on the Apple Music app, let alone play it via Sonos. You need to check your subscription regularly to make sure your Apple Music works correctly.
Part 2. Fixes to Apple Music App Not Working on Sonos
After understanding the reasons why Sonos unable to browse Apple Music, we can solve the problem according to these reasons. Most users have been bothered with two major problems: one is that the Apple Music app does not work properly on Sonos; the other is that the Sonos app unable to browse Apple Music. Let’s solve the former problem first.
Fix 1. Reauthorize Apple Music Service
If you’re having trouble connecting Apple Music with Sonos, try reauthorizing the Apple Music service on Sonos. Follow the steps below to reauthorize Apple Music on Sonos:
Step 1. Open the Sonos app on your device, and navigate to Settings.
Step 2. Select Services & Voices. Then choose Add a Service under Music & Content.

Step 3. Choose Apple Music.
Step 4. Enter your Apple ID and password to Enable Apple Music.
Step 5. Log into your Apple Music account.
Step 6. Once logged in, select Reauthorize to complete the process.
Fix 2. Check Apple Music Membership Validity
As an Apple Music subscriber, you will own more Apple Music features. Some features will be limited to use if your Premium subscription has expired, such as access to a Sonos speaker to play music. So check your Premium subscription regularly to avoid Apple Music not working properly on Sonos. To check your Apple Music subscription status, you should:
Step 1. Open the Apple Music app on your device.
Step 2. Tap the Profile icon to enter the Account section.
Step 3. Choose Manage Subscription to check if your subscription is valid.

Fix 3. Make Sure Apple Music Is Connected to Sonos
Once you’ve reauthorized and upgraded the Apple Music app, the next step is to make sure Apple Music is connected to Sonos. To do this, you have to open the Sonos app and head to the Manage Services page. And you’ll see if your Apple Music account is connected to the Sonos app.
Part 3. Fixes to Sonos App Unable to Browse Apple Music
Once the above issues are resolved, and under the premise that Apple Music can work properly on Sonos, let’s check the issue of Sonos unable to browse Apple Music.
Fix 1. Check Internet Connection
Issues with your internet connection can make Sonos not work correctly. Make sure your device is connected to a stable and reliable network before using Sonos. You can choose to run a speed test to test your connection speed. If your internet connection is unreliable, then switch to another. If it still does not work, turn on and turn off Airplane Mode. Then, try again to see if the internet has stabilized.
Fix 2. Upgrade the Sonos App
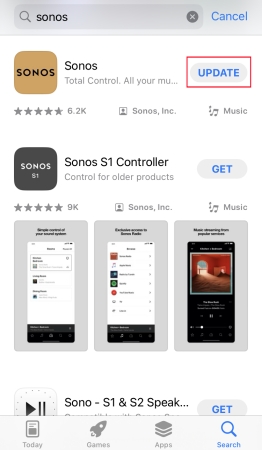
As mentioned in the last part, the outdated app will cause many unpredictable problems. Not only Apple Music but also Sonos should be updated to the latest version to promise better use. Just open your app store on your phone, and search for Sonos. Then tap the Update icon to upgrade it to the latest version.
Fix 3. Restart the Sonos App
Many apps might freeze up or crash from time to time, Sonos is no exception. The best way to handle it is to force close it and restart it after a few seconds. Force it to quit to make sure the app stops running in the background. After restarting, try playing Apple Music on Sonos again to see if it works properly.

Fix 4. Reset Your Sonos System
If you’ve tried all the methods above, but still having trouble using Sonos to browse Apple Music, you can try resetting your Sonos system. This can help fix any glitches that may be causing the issue. To do this, you should open the Sonos app and select Settings. Then choose System Restart and follow the instructions on-screen.
Part 4. Best Tool for Uploading Apple Music to Sonos
As we know, once you do not subscribe to the Apple Music service, all the music catalogs will disappear from your Apple Music library, including the downloaded music. Once the Apple Music subscription has expired, you will not be able to use Apple Music on Sonos freely. All these methods mentioned above will be unavailable when your Apple Music service is invalid. So we want to recommend an efficient way to get your downloaded Apple Music forever, even if you cancel the Apple Music subscription.
You’ll need Tunelf Audio Converter, an Apple Music downloader. It is designed to convert Apple Music, Audible books, and iTunes audio to MP3, FLAC, WAV, and many other normal formats with high sound quality. With this tool, you can upload Apple Music to Sonos and other devices without limitation. What’s more, Tunelf Audio Converter can also convert Apple Music with ID3 tag information. And the music metadata will be fully preserved for you to edit. With 30× faster speed, bunches of Apple Music songs can be converted in minutes. Can’t wait to take a look at this magic tool? Let’s see how to use it immediately.

Key Features of Tunelf Audio Converter
- Convert Apple Music to MP3, WAV, FLAC, AAC, and other audio formats
- Remove DRM from Apple Music, iTunes audios, and Audible audiobooks
- Preserve the converted audio with lossless audio quality and ID3 tags
- Support the conversion of audio format at a 30× faster speed in batch
Step 1 Import Your Apple Music Songs to Tunelf
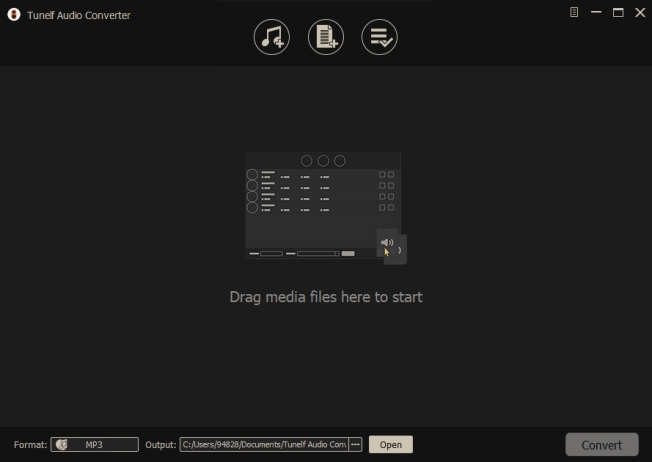
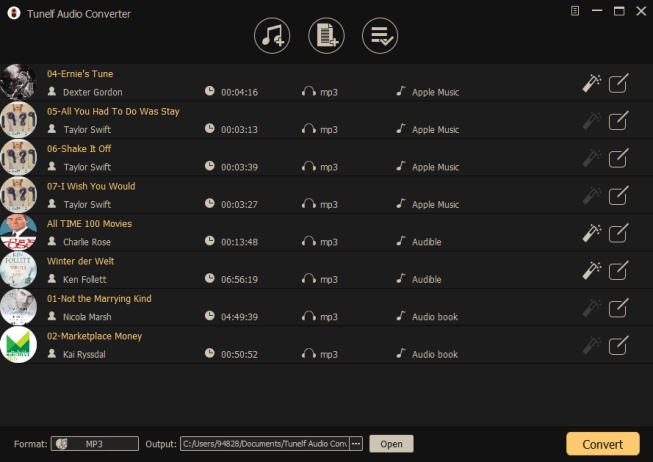
Open Tunelf Audio Converter, and click on the first Load iTunes Library icon from the upper left of the screen. Then the downloaded tracks in your Apple Music library will be presented. Choose the songs you want to convert and tap the Add icon to add them to the conversion list. Or you can simply drag and drop your downloaded songs from Apple Music to Tunelf.
Step 2 Set Output Parameters for Apple Music
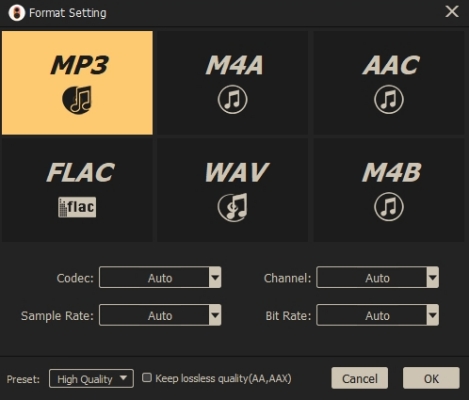
Once your songs are successfully added to Tunelf, you can click the Edit icon to edit the songs’ metadata information of title, album, genre, etc. Then click the Format button in the bottom left, and choose the output format as MP3, or other audio formats like WAV, AAC, FLAC, M4B, and M4A. You can also set the output audio parameters like sample rate, channel, and bit rate. Then click OK to keep all the settings.
Step 3 Start Converting Apple Music
Just click the Convert button on the right bottom of the panel, and then your added songs will be converted to your chosen format. This process will be completed in a few seconds. After that, you can view all the converted songs by clicking the Converted button. Now, you can listen to your Apple Music songs offline freely.
Step 4 Start Uploading Apple Music to Sonos
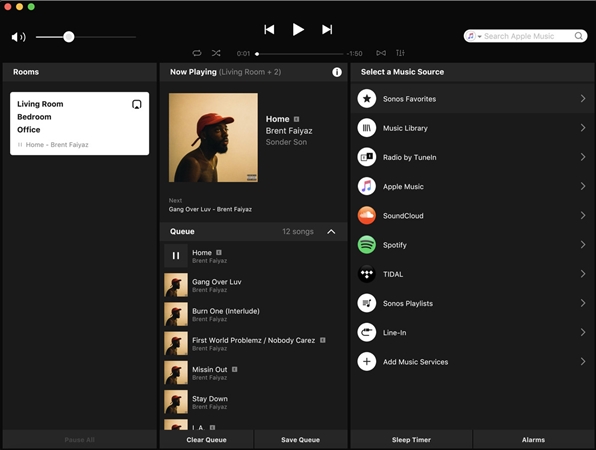
Open the Sonos app on your computer, and head to the Manage section to select Music Library Settings. Then click the + button on Mac or select Add on Windows to add the converted Apple Music songs. Locate the folder where you save the music and select the music files to add. Once you upload, you can play Apple Music on Sonos freely even without an Apple Music subscription.
Part 5. Conclusion
After reading this passage, you can apply these practical methods to help you browse your Apple Music on Sonos easily. If you want to play Apple Music on Sonos without the distraction of internet disconnection, or membership expiration, don’t forget to try the tool-Tunelf Audio Converter. Hope you enjoy your music journey on Sonos.
Get the product now:
Get the product now:


